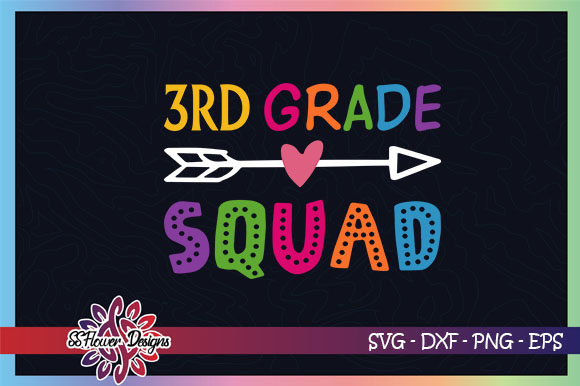
3rd Grade Vibes Only Back to School: What to Know Before You Buy, Cut, and Create
Back-to-school season brings a wave of excitement for students, teachers, and families. For those who love crafting, it also means personalizing shirts, tote bags, water bottles, and classroom decor. If you've come across the 3rd Grade Vibes Only Back to School design set, you're likely picturing a crisp shirt for the first day or a matching sibling set. These digital illustrations arrive as SVG, PNG, DXF, and EPS files, ready for your Cricut, Silhouette, or other cutting machine. But before you download, unzip, and start cutting, there are several practical points worth understanding. Many crafters, from beginners to experienced creators, encounter avoidable hiccups that waste time, material, or money. Let's walk through what to watch for, how to get the best results, and how to avoid the frustrations that come with digital cut files.
Understanding What You Actually Receive
The 3rd Grade Vibes Only Back to School product delivers one design file set compressed in a Winzip folder. Inside, you get an SVG for cutting, a high-resolution 300 PPI PNG for printing or mockups, a DXF for compatibility with older software, and an EPS for vector editing. The file itself does not include a watermark—the listing image shows one, but your downloaded version will be clean. This is standard practice, yet it catches many buyers off guard. They expect the file to look exactly like the watermarked preview, and some worry the watermark is permanent. Rest assured, it is not. But do check that the design matches what you saw. Occasionally, preview images show multiple color variations or layout options, and the actual file may contain only one. Read the product description carefully. If the listing says "you will receive one file as shown in the photo," you are getting that single design, not a set of variations. This is one of the most common misunderstandings with digital cut files. Knowing this upfront saves disappointment.
Software Compatibility: Not All Programs Handle Every File Type
One mistake that leads to frustration is assuming any cutting software can open every file format. The SVG file in this set works with Cricut Design Space, Silhouette Studio, Sure Cuts A Lot, Canvas, and similar programs. But if you use an older version of Silhouette Studio, you may need the DXF instead. Beginners sometimes download only the PNG, try to upload it into Design Space, and then wonder why the cut lines are missing. The PNG is great for print-then-cut or for previewing the design, but it does not contain cut paths. Always use the SVG or DXF for actual cutting. If your software asks for a specific format, choose accordingly. Another overlooked detail: the EPS file is primarily for vector editing in programs like Adobe Illustrator or CorelDRAW. If you plan to edit the design—resize, change colors, add text—use the EPS. Cutting software can sometimes open EPS, but it is not guaranteed. Stick with SVG for the most reliable cutting experience.
Unzipping: The Step Many Skip and Regret
Your files come compressed in a Winzip folder. This means you must unzip them after download before you can use them. It sounds simple, yet I see crafters trying to upload the zipped folder directly into Design Space or Silhouette Studio. That will not work. The software cannot read files inside a compressed folder. First, extract the contents to a folder on your computer. On a Windows machine, right-click and select "Extract All." On a Mac, double-click the zip file, and it will unzip automatically. Keep the extracted folder organized so you can locate the SVG quickly. If you plan to use the design multiple times or for different projects, consider keeping a master folder for all your 3rd Grade Vibes Only Back to School files. This prevents the annoyance of searching through downloads every time you want to make another shirt.
Cutting and Applying: Common Pitfalls with Vinyl and Fabric
Once you have your file unzipped and loaded into your cutting software, the real work begins. Many people assume the design will cut perfectly on the first try, but a few details matter. First, check the size. The design may default to a certain size in your software, and if you scale it too large or too small, the details may become distorted or too delicate to weed. For a standard adult T-shirt, a design width of 8 to 10 inches usually works. For a child's shirt, 6 to 8 inches is safer. Test the size on a piece of cardstock before committing to vinyl. Second, consider the material. If you are cutting adhesive vinyl for a glass pane or water bottle, use the appropriate blade and pressure settings. If you are cutting iron-on vinyl for clothing, mirror the design before cutting. Forgetting to mirror is one of the most frequent mistakes, and it results in a backward design that cannot be fixed. Always mirror heat-transfer vinyl.
Another overlooked issue is the complexity of the design itself. The 3rd Grade Vibes Only Back to School artwork likely includes text and graphics. Small text, thin lines, or intricate details can be difficult to weed, especially for beginners. If the design has very fine elements, consider using a weeding tool with a fine tip and tweezers for tiny pieces. Alternatively, you can simplify the design by removing some elements in your editing software before cutting. Remember: there is no guarantee the quality of the designs once they are altered, edited, or converted. That means if you change the file, you assume responsibility for the outcome. Proceed carefully, and always keep a backup of the original unedited file.
Embroidery: A Different Process Entirely
The listing mentions you can convert and embroider the design onto fabrics. This is true, but it requires additional steps. The SVG and DXF files are not embroidery files. They are vector cut files. To embroider the 3rd Grade Vibes Only Back to School design, you will need to convert it into an embroidery format like PES, DST, or EXP using digitizing software. This is not a one-click process. Beginners often assume they can load an SVG directly into their embroidery machine, but that rarely works. If you want to embroider this design, you have two options: learn to digitize yourself using a program like Hatch, Embrilliance, or Ink/Stitch, or hire a digitizer. Both options add cost and time. If you are not prepared for that, stick with vinyl cutting or print-then-cut methods.
Quality, Resolution, and Printing Considerations
The PNG file is 300 PPI, which is high resolution suitable for printing. If you plan to print the design on transfer paper or use it for stickers, this resolution will give you crisp results. However, some people confuse the PNG with a cut file and try to cut around the printed image manually. That works, but it will not match the precision of a machine cut. If you want to use the print-then-cut feature in Cricut Design Space, upload the PNG, set the cut lines, and let the machine do the work. Test on plain paper first. Also, be aware that the colors in the PNG may appear slightly different on your screen versus on printed material. This is normal, but if color accuracy matters to you, do a small test print before committing to final fabric or paper.
Buying Smarter: What to Check Before You Purchase
Before you click "buy," take a moment to verify a few things. First, confirm the license. Most digital cut files for personal use permit you to make items for yourself and gifts, but not for large-scale commercial sales. If you plan to sell shirts with 3rd Grade Vibes Only Back to School, check the seller's license terms. Some allow small commercial use, others do not. Second, look at the reviews. Crafters often share photos of their finished projects. This gives you a realistic sense of how the design looks on actual shirts, cups, or signs. If the reviews mention that the design weeded easily or that the file was exactly as described, that is a good sign. Third, ensure the file format matches your software. If you use an iPad version of Design Space, some formats may not upload smoothly. SVG is the safest bet across platforms. Finally, check the return policy. Digital files are usually non-refundable once downloaded, but a reputable seller will often help if the file is corrupted or unopenable. Contact the seller before purchasing if you have any doubts.
Getting the Best Results: Practical Advice for Success
To make your 3rd Grade Vibes Only Back to School project look polished and professional, follow a few simple habits. Always test your cut settings on a scrap piece of material before cutting the final product. This prevents wasted vinyl or fabric. Use a fresh blade for intricate cuts. A dull blade will tear or lift the material, ruining fine details. When applying heat-transfer vinyl, follow the manufacturer's time and temperature recommendations. Press firmly and evenly, and peel hot or cold as directed. For glass or hard surfaces, clean the surface thoroughly before applying adhesive vinyl. Any dust or oil will prevent the vinyl from sticking. If you are making multiple items for a classroom or family, consider cutting all the designs at once to save time. Batch cutting is efficient, but double-check that your material size is correct for each piece.
Another smart approach: keep a project log. Note the size you used, the material type, the blade setting, and any adjustments you made. This is especially helpful if you plan to recreate the same design later or share it with a friend. It also helps when troubleshooting. If a cut did not go well, you can look back and see what changed. Over time, this simple habit saves hours of guesswork.
Common Misunderstandings About Digital Files
One persistent myth is that digital cut files are "instant" and require no effort. In reality, you still need to unzip, upload, size, cut, weed, and apply each design. Another misunderstanding is that the design will look exactly like the listing photo on every material. The photo is often a digital mockup. On a dark shirt, the design may appear less vibrant. On a textured fabric, fine details may not transfer cleanly. Manage your expectations and test before committing. Also, some buyers think the file will include multiple layouts, colors, or variations. Most listings specify clearly: "one file as shown." If you want multiple colors or sizes, you may need to purchase separate files or edit the design yourself. Editing is possible, but remember the seller's note about no guarantee once altered. If you are not comfortable with vector editing, look for a design that is ready to use as is.
Who Benefits Most from This Design
The 3rd Grade Vibes Only Back to School set appeals to a wide audience. Parents want to make memorable first-day outfits. Teachers coordinate classroom themes or matching shirts for their team. Small business owners look for trending designs to sell at local markets or online. Hobbyists enjoy the creative process of cutting and applying. Bloggers and social media creators use these designs to showcase tutorials or share back-to-school content. The design is also popular among club leaders, scout groups, and sports teams for spirit wear. No matter your role, the same practical advice applies: know your tools, test your materials, and read the product details carefully. This design can yield excellent results when handled with care and attention.
Ultimately, the 3rd Grade Vibes Only Back to School digital illustrations give you a flexible starting point. Whether you cut vinyl for an iron-on shirt, etch a glass pane, or convert for embroidery, the key is preparation. Avoid the common mistakes of skipping the unzip step, forgetting to mirror, using the wrong file format, or assuming the design is editable without risk. With a little planning and patience, you will end up with a project that looks great and holds up well. That is the real vibe of third grade—ready, confident, and creative.