Back-to-School Crayon SVG Files: Your Complete Guide to Creative DIY Projects
As the summer days wind down and the familiar scent of new school supplies fills the air, parents, teachers, and creative enthusiasts alike begin preparing for the back-to-school season. One of the most exciting trends in recent years has been the use of digital cut files, particularly crayon-themed SVG designs, to create personalized and memorable school-related items. Whether you are a seasoned crafter with a Cricut or Silhouette machine, or someone just discovering the world of digital illustrations, understanding how to use these versatile files can open up a world of creative possibilities. This guide will walk you through everything you need to know about back-to-school crayon SVG files, from what they are and how they work to practical project ideas and tips for getting the best results.
What Exactly Is a Back-to-School Crayon SVG File?
SVG stands for Scalable Vector Graphic. Unlike standard image formats such as JPEG or PNG, an SVG file is built using mathematical equations rather than pixels. This means it can be scaled up or down infinitely without losing any quality or becoming pixelated. A back-to-school crayon SVG file is simply a digital illustration of a crayon or crayon-themed design, often accompanied by phrases like "Get Your Crayon" or "Back to School," that has been created specifically for use with cutting machines and other design software. These files are not just simple pictures — they are precise digital blueprints that tell a cutting machine exactly where to cut, score, or draw. Because they are vector-based, they maintain crisp, clean edges at any size, making them ideal for everything from tiny stickers to large iron-on transfers for tote bags or t-shirts.
Why Crayon Themes Are Perfect for Back-to-School Projects
Crayons are universally recognized as a symbol of childhood creativity, learning, and the excitement of a new school year. They evoke a sense of nostalgia and playfulness that resonates with both children and adults. Using a crayon-themed SVG design for back-to-school projects allows you to tap into that positive emotional connection. Whether you are creating a personalized lunchbox, decorating a homework folder, or crafting a welcome gift for a new teacher, a crayon design instantly communicates warmth, color, and the joy of learning. The simple, bold shapes of crayons also translate exceptionally well into cut files — they are easy to weed, layer, and apply to various surfaces, making them a favorite among both beginners and experienced crafters.
What File Formats Can You Expect?
When you purchase or download a high-quality back-to-school crayon SVG set, you typically receive a bundle of file formats designed to work with different software and machines. The most common formats include:
- SVG — The primary vector format, compatible with Cricut Design Space, Silhouette Studio, Sure Cuts A Lot, Canvas, and most other cutting software. This is the file you will use for most cutting projects.
- PNG — A high-resolution raster image, often provided at 300 PPI (pixels per inch), which is perfect for printing, digital scrapbooking, or using in applications that do not support vector files. The high PPI ensures sharp, clear prints.
- DXF — Another vector format commonly used by Silhouette Studio and some CAD-based software. It is useful for certain cutting workflows.
- EPS — A vector format widely supported by professional graphic design software like Adobe Illustrator and CorelDRAW. It is excellent for advanced editing and conversion tasks.
These files are typically compressed in a WinZip or ZIP folder to make downloading faster and to keep the bundle organized. After downloading, you will need to unzip the folder to access the individual files. The files you receive will not have any watermarks, so you can use them freely in your projects.
How to Use Crayon SVG Files with Cutting Machines
One of the most powerful features of SVG cut files is their compatibility with popular cutting machines like Cricut and Silhouette. Here is a step-by-step overview of how the process generally works, keeping in mind that specific steps may vary slightly depending on your software:
- Unzip Your Files — After downloading, locate the ZIP folder on your computer and extract its contents. You will see the individual SVG, PNG, DXF, and EPS files inside.
- Upload to Your Design Software — Open your cutting software (such as Cricut Design Space or Silhouette Studio). Use the upload or import function to bring in the SVG file. The software will recognize the vector paths and display the design.
- Resize and Customize — Because SVG files are scalable, you can resize the crayon design to fit your project without worrying about quality loss. You can also change colors, add text, mirror the image if needed (for iron-on projects), or combine it with other designs.
- Prepare Your Material — Load your cutting mat with your chosen material. Common options include vinyl (for permanent or iron-on applications), cardstock, adhesive foil, or heat transfer vinyl (HTV).
- Cut the Design — Send the design to your machine and let it cut. The software will follow the vector paths precisely, producing clean, accurate cuts.
- Weed and Transfer — Remove the excess material (weeding) around your crayon design. For vinyl projects, use transfer tape to lift the design and apply it to your final surface — whether that is a notebook, water bottle, t-shirt, or glass pane.
- "SVG files are the same as JPEG or PNG." No. While you can view an SVG on your screen, it is fundamentally different. JPEGs and PNGs are raster images made of pixels; SVGs are vector images made of mathematical paths. This difference is crucial for cutting machines, which need vector paths to know where to cut.
- "I can edit SVG files in any image editor." Not all image editors support vector editing. Software like Cricut Design Space, Silhouette Studio, Adobe Illustrator, Inkscape, and CorelDRAW can handle SVGs properly. Basic photo editors may only show a preview or rasterize the file.
- "The file will work exactly the same in every software." While SVG is a standard format, minor differences in how software interprets paths, layers, and colors can occur. It is always a good idea to test a simple cut on a scrap piece of material first.
- "I can use the design commercially without restrictions." This depends entirely on the license agreement that comes with your particular file set. Some SVG files are for personal use only, while others allow limited commercial use. Always check the terms provided by the designer.
- Always test cut first — Before cutting your final material, do a small test cut on a scrap piece to verify that the blade pressure, speed, and material settings are correct.
- Mirror your design for iron-on projects — When using heat transfer vinyl, remember to mirror the image horizontally in your software before cutting. This ensures the design reads correctly when applied to the fabric.
- Use high-quality vinyl and transfer tape — Cheap materials can lead to poor adhesion, difficult weeding, and designs that peel off prematurely. Invest in reputable brands for the best results.
- Keep your files organized — Save your unzipped files in clearly labeled folders. Consider creating subfolders for SVG, PNG, DXF, and EPS versions. This will save you time when you want to reuse a design later.
- Explore layering — Crayon designs with multiple colors can be cut as individual layers and assembled. This creates a stunning dimensional effect, especially on t-shirts and tote bags.
Practical Project Ideas for Back-to-School Crayon SVGs
The versatility of these cut files means you can apply them to a wide range of surfaces and materials. Here are some of the most popular and practical uses:
Custom Clothing and Accessories
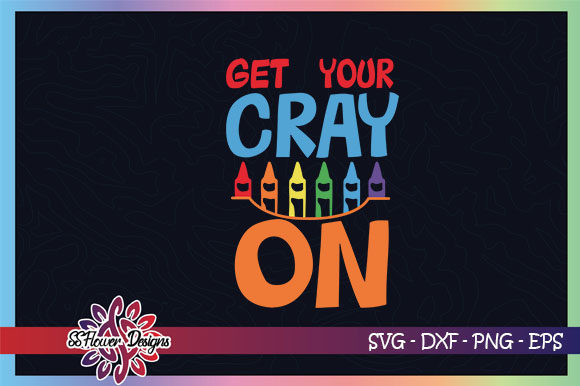
Using iron-on vinyl (heat transfer vinyl), you can cut the crayon design and press it onto t-shirts, hoodies, tote bags, or even backpacks. A bright, colorful crayon with the words "Get Your Crayon" or "Back to School" makes for a cheerful first-day outfit. You can also create matching accessories like pencil cases or hats.
Personalized School Supplies
Permanent vinyl adheres well to hard surfaces like plastic, metal, and glass. Decorate lunchboxes, water bottles, binders, and notebooks with crayon SVG designs. This not only helps children identify their belongings but also adds a personal, creative touch that store-bought items lack.
Home and Classroom Decor
Apply the design to glass panes (using vinyl suitable for glass), create wall decals for a classroom or child's bedroom, or make custom gift tags and cards. The bold, simple shapes of crayons are particularly effective as decorative elements in a learning environment.
Embroidered Items
While SVG files are primarily designed for cutting, they can also be converted for embroidery purposes. With the right software and an embroidery machine, you can transform the vector paths into stitch files. This allows you to embroider crayon designs onto fabric items like towels, aprons, or pillowcases. Note that conversion may require additional software and some trial and error to ensure the design stitches out correctly.
Gifts for Teachers and Classmates
A personalized tote bag, a set of custom pencils, or a decorative mug featuring a cheerful crayon design makes a thoughtful and inexpensive gift for teachers. For classmates, small vinyl stickers or personalized bookmarks are easy to produce in bulk and are sure to be appreciated.
Understanding File Quality and Limitations
When you receive a crayon SVG file that is 300 PPI PNG and high-quality vector, you are getting professional-grade artwork. The 300 PPI resolution ensures that if you print the PNG version, it will be sharp and clear, with no visible pixels. The SVG version, being vector-based, has no resolution limit at all — it will remain crisp whether you print it postage-stamp size or billboard size.
However, it is important to understand that once you alter, edit, or convert the original files, the quality of the design is no longer guaranteed. For example, if you open a high-quality SVG in a basic image editor and save it as a low-resolution JPEG, you will lose the vector properties and introduce pixelation. Similarly, converting an SVG to an embroidery format may require manual adjustment to ensure stitch density and path order are correct. Always keep a backup of the original unaltered files so you can return to them if needed.
Common Misunderstandings About SVG Cut Files
Many newcomers to digital crafting have a few misconceptions about how SVG files work. Let us clarify the most common ones:
Tips for Getting the Best Results with Your Crayon SVG Files
To ensure your back-to-school projects turn out beautifully, keep these practical tips in mind:
Conclusion: Embracing Creativity with Back-to-School SVG Files
Back-to-school crayon SVG files offer a delightful way to blend practicality with creativity. Whether you are a parent looking to personalize your child's school supplies, a teacher wanting to add warmth to your classroom, or a craft business owner seeking fresh designs for your product line, these digital illustrations provide a flexible, high-quality foundation. The ability to use the same file for cutting vinyl, printing on paper, converting for embroidery, or designing digital graphics makes SVG files an incredibly valuable tool in any crafter's arsenal. By understanding the formats, respecting the limitations, and following best practices for cutting and application, you can create beautiful, durable, and meaningful items that celebrate the spirit of learning and creativity. So go ahead — get your crayon, fire up your cutting machine, and make this back-to-school season uniquely your own.