Back to School Sublimation Preschool: Streamlining Your Production Workflow with High-Quality PNG Templates
For creators, small business owners, and educators preparing for the back-to-school season, having reliable design assets can make the difference between a rushed product and a polished collection. The Back to School Sublimation Preschool template package offers a ready-to-use, high-quality PNG design with a transparent background, free of any name or watermark. This article walks through how to integrate these templates into your sublimation workflow — from preparation and file handling to final print and long-term reuse — so you can produce shirts, mugs, bags, and more with consistency and efficiency.
What the Back to School Sublimation Preschool Template Includes and Why It Fits Your Process
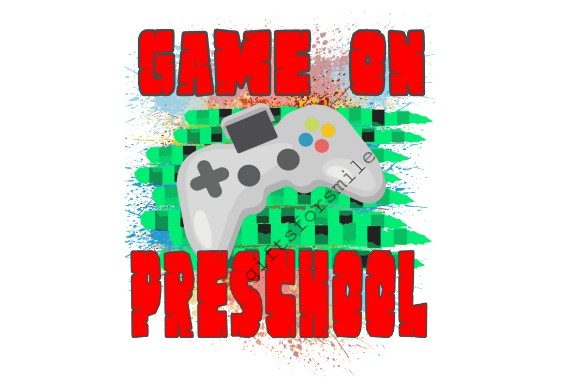
This design set typically contains one or more PNG files optimized for sublimation printing. The transparent background eliminates the need for manual masking or background removal, saving significant time during the design layout phase. Because the templates come without embedded names or watermarks, they are ready for commercial use — you can add your own text, branding, or personalization elements without worrying about extra cleanup.
In a broader production context, this template acts as a foundation layer. It fits naturally into the design and prep stage of your workflow, whether you are creating a single product for your child’s preschool class or building a full product line to sell on Etsy, Amazon Handmade, or at local markets. By providing a clean, high-resolution graphic, the template removes friction from the creative process and lets you focus on layout, sizing, and color management.
Preparing Your Workspace: Software, Files, and Compatibility
Before you print a single shirt or mug, take a few minutes to set up your digital workspace. The PNG files work with virtually any design or print software that supports layers and transparency — Adobe Photoshop, Silhouette Studio, CorelDRAW, Affinity Designer, or even free tools like GIMP. Store the template in a dedicated folder for this season’s back-to-school projects, and make sure your color profile matches your printer and substrate (generally sRGB for sublimation).
File Format and Transparency Best Practices
The transparent PNG format gives you maximum flexibility. When importing the template into your design software, check that the background channel remains transparent. If your software interprets transparency as white, adjust the layer blending mode or set the background to none. This step is critical for mugs and other curved substrates where the design must blend seamlessly with the surface. For shirts, the transparent background ensures the garment color shows through exactly where the design doesn’t cover.
Using the Template Before the Print Run: Mockups and Test Prints
One of the most practical uses of the Back to School Sublimation Preschool design is for mockups and sample proofs. Before committing to a bulk production run, create digital mockups to show clients or test different color variations. The high-resolution PNG reproduces cleanly at varied sizes, so you can quickly scale it for a 4-inch mug wrap or a full-size toddler tee.
Conduct a test print on the same type of substrate you plan to use in production. This step verifies color accuracy, resolution, and how the design reacts to heat and pressure. Because the template comes without any watermark or branding, you can evaluate the image purely on its own quality — no distractions, no hidden logos. Document test results so you can replicate successful settings later.
Integrating the Design into Your Production Workflow During Sublimation
Once you have finalized your layout and confirmed your printer settings, the template feeds directly into your print-and-press cycle. Open the PNG in your print software, size it to match your substrate (accounting for any reduction due to shrink or stretch), and output to sublimation paper. The transparent background means you do not need to crop or delete any extraneous areas — just place the design exactly where you want it.
When pressing, position the paper with the design facing the substrate and apply consistent heat and pressure according to your press manufacturer guidelines. The high-quality PNG should hold fine details and solid colors without pixelation or banding, as long as your printer resolution is set to at least 300 DPI. For jobs where you need to produce many identical items, consider using the template as a master file and batch printing multiple copies in one pass.
After the Project: Quality Control, Storage, and Reusability
Immediately after pressing, inspect each product for ghosting, color shifting, or spots where the design did not transfer evenly. Because the template’s transparent background minimizes the risk of white halos or uneven edges, most issues will come from temperature or pressure deviations — not from the design file itself. Log any problems and adjust your process accordingly.
The same PNG template can be reused for future back-to-school seasons or rotated with different typography and color palettes. Store the original file in a lossless format (PNG is fine) inside a clearly labeled folder: Back_to_School_Preschool_2025. That way, next year you can either use it as-is or remix it with a new color scheme without redownloading or recreating the base artwork. This approach builds a library of reusable assets that cut down preparation time for each selling cycle.
Interaction with Other Tools, Resources, and Suppliers
The Back to School Sublimation Preschool template does not exist in isolation. It interacts with your printer’s ICC profile, your heat press, and your choice of substrate. For custom orders, you might layer the template with a child’s name or classroom number using a separate font file. If you work with a print-on-demand partner or a wholesale supplier, you can share the transparent PNG with them directly — they will appreciate not having to remove backgrounds themselves.
For marketers and bloggers, the template can also be used in social media preview images, email newsletters, or blog graphics to promote your back-to-school products. The transparency allows you to place the design over different background images without awkward edges, maintaining a professional look across platforms.
Practical Implementation Tips for Small Business Owners and Creators
- Use a consistent naming convention for your template files (e.g., bts_preschool_main.png) to keep your asset library organized.
- Create a master layout document in your design software that already includes the template at the correct size for your most common substrate (e.g., a 10-ounce mug template). Then just copy and paste the PNG into that document each time you start a new job.
- Test on low-cost blanks first to validate color and size before using premium garments or ceramics.
- Save a version of the design with no additional elements for wholesale use — many clients prefer minimal branding.
- Document your heat press settings (time, temperature, pressure) alongside the file name so you can repeat successful results.
Common Workflow Challenges the Template Helps You Avoid
One frequent hurdle in sublimation is dealing with designs that have complex backgrounds or low-resolution elements. This preschool template’s high quality and transparency remove two pain points at once: you do not waste time erasing backgrounds, and you avoid pixelated prints when scaling up for larger substrates like tote bags or blankets. The professional-grade resolution holds up even at 12x12 inches or larger, so you can confidently offer a range of product sizes without needing multiple file versions.
Another challenge is tracking usage rights. Since this template includes no watermark or embedded names, you are free to use it for commercial projects without needing to overlay a credit or remove a logo. This simplifies client approvals and reduces friction when handing off files to print partners.
Measuring Success and Iterating for Future Seasons
Once you start selling or using the products, pay attention to which designs perform best. Keep a simple spreadsheet noting the template used (Back to School Sublimation Preschool), the substrate, the sale price, and any customer feedback. Over time, you will see patterns — perhaps the preschool theme sells better on onesies than on ceramic mugs, or a certain color variant outpaces others. Use these insights to inform how you modify or combine the template next season.
Iteration does not always require a new design file. You can adjust the color palette, add a border, or combine the preschool graphic with other elements like numbers or letters. The original high-quality PNG remains the stable foundation, and each variation becomes a new product or bundle.
Long-Term Integration into Your Creative Routine
To get the fullest value from the Back to School Sublimation Preschool template, treat it as a repeatable asset rather than a one-off purchase. Incorporate it into your seasonal planning calendar: prepare your design files four to six weeks before the peak selling window (typically late July through mid-September). Use the same base file each year, refreshing the typography or adding a year-specific badge. This habit builds brand consistency while keeping production manageable.
For hobbyists, the template simplifies the process of creating personalized gifts for family and friends. For entrepreneurs and publishers, it reduces the time between idea and finished product. By removing technical obstacles like background removal and resolution issues, you can focus on the creative and business decisions that truly drive results.
Ultimately, a well-designed sublimation template like this one is not just a picture — it is a workflow tool. When you understand how to fit it into your preparation, production, and post-production processes, you unlock its full potential. Whether you are printing a single mug or launching a full product line, the Back to School Sublimation Preschool design helps you move from concept to customer more smoothly, season after season.