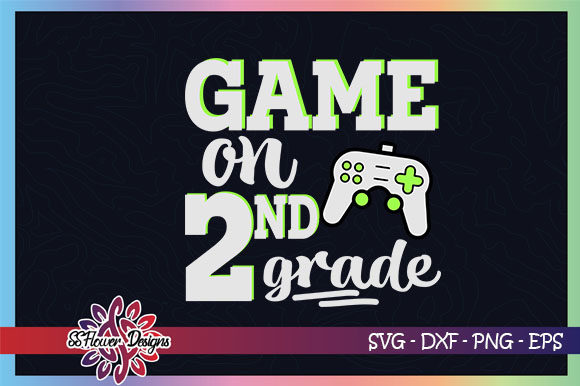
Game On, Back to School 2nd Grade: A Practical Workflow for Custom Classroom Creations
Preparing for a new school year often means balancing logistics, creativity, and a tight timeline. Whether you are a parent looking to personalize supplies, a teacher setting up a welcoming classroom, or a small business owner fulfilling custom orders, the right digital asset can simplify your workflow. The Game on, Back to School 2nd Grade SVG file offers a ready-to-use design that integrates directly into your existing cutting and crafting process. This article walks through what this file is, where it fits in your planning, and how to use it efficiently from download to finished product.
Understanding the Asset and Its Role in Your Process
At its core, the Game on, Back to School 2nd Grade design is a digital illustration delivered in multiple vector and raster formats: SVG, PNG (300 PPI high quality), DXF, and EPS. These formats are standard in the cutting and crafting industry, which means the file works with software like Cricut Design Space, Silhouette Studio, Sure Cuts A Lot, and Canvas. The PNG version, at high resolution, also gives you flexibility for print-on-demand or digital mockups.
This file is not just a static image. It is a production-ready cut file that you can manipulate, resize, and adapt for different materials—vinyl, iron-on, cardstock, or fabric. The key advantage is that it removes the need to design from scratch. Instead, you spend your time on execution: cutting, weeding, pressing, and assembling. For anyone managing multiple back-to-school projects, this efficiency matters.
Before School Starts: Planning and Batch Production
In the weeks leading up to the first day, you likely have a list of items to label, decorate, or create. The Game on, Back to School 2nd Grade design can be queued alongside other back-to-school assets. Because the file is delivered in a compressed ZIP folder, you can download, unzip, and organize it into a project folder on your computer or cloud drive. This preparation step ensures you are not hunting for files when you are ready to cut.
For small business owners, this is the time to batch-produce shirts, tote bags, or water bottles for customers. The SVG format allows you to scale the design to fit different product sizes without losing sharpness. You can pre-load the design into your cutting software, adjust the dimensions, and run multiple cuts in one session. The 300 PPI PNG also works well for creating mockups to show customers before production.
During the School Year: Classroom Projects and Personalization
The school year does not end the usefulness of this file. Teachers can use the design for bulletin boards, name tags, or reward charts. Because the file comes with DXF and EPS formats, you can import it into embroidery software if you have a machine that supports those formats. This opens up the possibility of stitching the design onto fabric items like pencil cases, book bags, or even uniform patches.
For parents, the design can be cut from removable vinyl for a glass pane or water bottle. This is especially useful when your child wants a themed item mid-year. You already have the file, and you can cut a new piece in minutes. The key is that the file remains reusable—you are not locked into a single use or a limited license. You can return to it as often as needed.
After the School Year: Repurposing and Inventory
When the school year wraps up, the design can still serve a purpose. You might create end-of-year gifts, thank-you tags for teachers, or memory book decorations. If you run a craft business, unsold inventory that used this design can be repurposed into different products—for example, adding the design to a different blank substrate like a notebook or canvas pouch. Because the original file is vector-based, you can also modify elements (change colors, remove parts, add text) to create variations without starting from zero.
Cutting Software and Machine Compatibility
The file is designed to work with the most common cutting ecosystems. If you use Cricut Design Space, the SVG format imports cleanly. In Silhouette Studio, you can use either SVG or DXF. The key step is to unzip the downloaded folder before importing—this is a small but crucial habit. Once imported, check the design for any overlapping lines or stray nodes. The file provided is high quality, but after resizing or rotating, it is good practice to run a preview cut on scrap material to confirm alignment.
For those using Sure Cuts A Lot or Canvas, the EPS format offers an additional fallback. Having multiple format options means you are not dependent on a single software workflow. If one format behaves oddly, you can try another. This kind of compatibility planning is especially helpful when you collaborate with other creators who may use different tools.
Material Selection and Quality Control
The design works best with adhesive vinyl, iron-on (heat transfer vinyl), and cardstock. For iron-on applications, remember that the design should be mirrored before cutting—most cutting software has a mirror toggle, but it is easy to forget. A common workflow error is cutting without mirroring, which results in a backward design on the final shirt. Add a mirror step to your checklist.
When cutting for glass panes or windows, use removable vinyl. Permanent vinyl works for outdoor items like lunch boxes or water bottles, but test a small piece first to ensure the material adheres properly to the surface. For embroidery, the DXF or EPS format needs to be converted by your embroidery digitizing software. Not all home embroidery machines read these formats directly, so check your machine's requirements before assuming compatibility.
Collaboration with Clients or Team Members
If you are fulfilling custom orders, share a mockup made with the PNG file before production. This sets clear expectations and reduces the chance of rework. The high-resolution PNG (300 PPI) prints cleanly for proofing purposes. You can also use it on social media to showcase your back-to-school offerings. Because the file does not contain watermarks after purchase, you can present it professionally without distracting marks.
Practical Implementation Tips for a Smooth Workflow
- Organize your digital files immediately. After downloading, create a dedicated folder for back-to-school designs. Name the folder clearly—for example, "Back to School 2025 - Game On 2nd Grade." This prevents confusion when you have multiple designs.
- Test the file in your cutting software before any production run. Import the SVG, check the size, and run a test cut on cheap vinyl or paper. Measure the result against your intended surface to ensure the scale is appropriate.
- Keep the unzipped folder intact. Do not delete the original ZIP file or the extracted folder until the project is complete. If a file becomes corrupted, you have the original to fall back on.
- Use the PNG for mockups and the SVG for cutting. The PNG gives you a pixel-perfect preview, while the SVG provides scalable vector paths. Do not cut from the PNG—it lacks the cut lines needed for your machine.
- Batch similar tasks together. If you are making multiple shirts with the same design, cut all the iron-on at once, then weed and press in sequence. This reduces setup and cleanup time.
- Document your settings. Note the material type, blade depth, and pressure used for each cut. If you need to reproduce a product later, you can replicate the settings exactly.
Usability and Long-Term Value
The Game on, Back to School 2nd Grade design is not a one-time use file. Because it is delivered in multiple formats, it remains useful across different machines and projects. The design itself is thematic but not overly seasonal—the "game on" motif works for sports-themed classrooms, achievement boards, or even birthday gifts for a second grader. You can pair it with other designs or use it as a standalone element.
Quality considerations are straightforward. The file is provided without watermark, and the vendor states that there is no guarantee of quality after alterations. This means you should keep a backup of the original files before making any edits. If you plan to change colors, rotate elements, or combine the design with other graphics, work on a copy. The original remains unmodified for future use.
For business owners, this design can be part of a consistent product line. If you offer back-to-school collections each year, having a reliable SVG file that cuts cleanly and scales well reduces your preparation time for the next season. The investment is in the file itself, but the return comes from repeated use over multiple orders or personal projects.
Common Workflow Pitfalls to Avoid
One frequent issue is forgetting to unzip the file. The compressed folder needs to be extracted before your cutting software can read the contents. If you import the ZIP directly, most programs will not recognize it. Another common mistake is using the wrong format for the wrong purpose—for example, trying to cut from the PNG instead of the SVG. Always match the format to the task: SVG or DXF for cutting, PNG for printing or proofing.
Also, be aware that some cutting software limits direct import of EPS files. If you encounter this, convert the EPS to SVG using a free online converter. This extra step is rare but worth knowing ahead of time. Finally, when cutting iron-on, ensure the design is mirrored. If you skip this, the final product will be reversed, and you will waste both material and time.
Integrating the Design into a Broader Back-to-School Strategy
Whether you are equipping one child or fulfilling fifty customer orders, the Game on, Back to School 2nd Grade SVG file plays a specific role: it reduces design time and increases production consistency. By preparing your files in advance, testing your materials, and documenting your settings, you create a repeatable workflow that saves you effort on every subsequent project.
The file itself is a tool, not a complete solution. Its value comes from how you integrate it into your existing process—your cutting machine, your material choices, your quality checks, and your timeline. When you treat it as part of a larger system rather than an isolated asset, you get the most out of the download.
Start by unzipping, importing, and testing. From there, the design is ready to support your back-to-school goals, whether that means personalized shirts, organized supplies, or a classroom that feels welcoming from day one.